Author Archives: The Amixa Web Guru

WordPress, PHP and IIS setup of REDIS using Redis Object Cache Free Plugin

Note:  This presumes you already have a working REDIS server inside your LAN.  If you don’t, please see my coming post on how to set up a REDIS virtual machine on HYPER-V.


  1. You will need to install the php REDIS extension.  I am using IIS 10 and Windows Server 2022, so I went to this page: https://pecl.php.net/package/redis and downloaded 5.3.7 stable (as of 04-2023).
  2. Extract
  3. I am on the latest 7.4x build of PHP which is 7.4.33 as of 04-2023.  This will supposedly work fine under 8.x but I haven’t tested it inside my environment.
  4. copy the files pictured below to your PHP EXT folder.
  5. Add REDIS information into your wp-config.php file
    1. edit the file
    2. near the top of the file, add the following
    3. // adjust Redis host and port if necessary 
      define( 'WP_REDIS_HOST', 'x.x.x.x' );
      define( 'WP_REDIS_PORT', 6379 );
      
      // change the prefix and database for each site to avoid cache data collisions
      define( 'WP_REDIS_PREFIX', 'name-of-your-site' );
      define( 'WP_REDIS_DATABASE', 0 ); // 0-15
      
      // reasonable connection and read+write timeouts
      define( 'WP_REDIS_TIMEOUT', 1 );
      define( 'WP_REDIS_READ_TIMEOUT', 1 );
      define( 'WP_REDIS_SCHEME', 'tcp' );
    4. CHANGE the HOST IP to the LAN IP of your REDIS server
    5. CHANGE the PREFIX to a unique friendly name of your site
    6. CHANGE DATABASE (a number between 0 and 15, which needs to be unique and for this website only)
    7. Save changes
  6. Edit your PHP.ini file and add the following line
    1. extension=php_redis.dll
    2. save
  7. Go to the WordPress Admin
  8. Plugins, Add new Plugin
  9. Search for REDIS
  10. clock on REDIS OBJECT CACHE, click install
  11. click Activate
  12.  Look at the REDIS plugin
    1. SETTINGS->REDIS
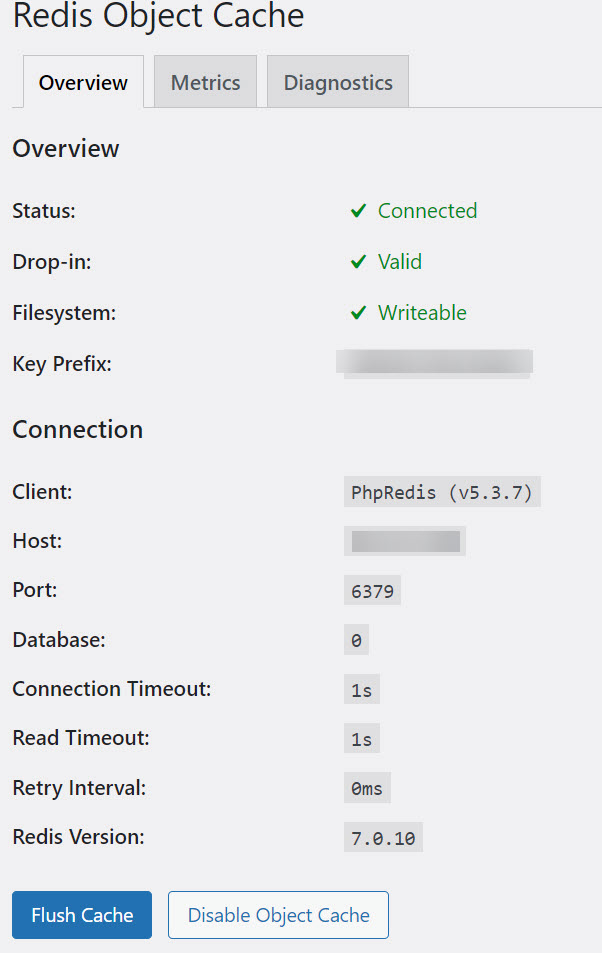
  13. Hopefully you will see three green checkboxes, which means your REDIS cache is up and running.
  14. If you don’t have three green checkmarks as above, I am available for consultation on your project.  Please reach out to me here.

The response is not a valid JSON response – Windows IIS

If you’re I presume you’ve already tried some other techniques to fix the “The response is not a valid JSON response” issue with WordPress running on Windows Server and IIS.

In my case, I am running PHP 8.1.8 and the issue was easy to fix.

For me, the error happened while trying to save content to a Widget.

In the log files I noticed the OPTIONS verb being used and a 405 error.

The fix is simple.  Go to HANDLER MAPPINGS, double click your PHP mapping.

Click REQUEST RESTRICTIONS.

Click VERBS

do one or the other.  Add the word OPTIONS to the current list, OR just click ALL VERBS.

Save changes.

Your “The response is not a valid JSON response” should now go away.


NOTE:  On IIS WordPress setups, you need to make sure you have a HOSTS file mapping for your website to the local IP address for the website (NOT PUBLIC IP, local machine IP).  This is necessary for the various CRON jobs to work.


How to get IMAGICK working under Windows Server IIS

Here is the simple method to get IMAGICK working under Windows Server 2019/2022 and IIS 10.0 and later.


  1.  Presuming using PHP 7.4.X (current version is 7.4.27 as of 2/14/22).  NOTE:  This is not working properly under PHP 8.x
  2. Make sure you’ve downloaded the most current 7.4.X version and installed it on your IIS/PHP Manager, which properly sets up the handler mappings.
  3.  download IMAGICK
    1. https://windows.php.net/downloads/pecl/releases/imagick/
    2. Pick the most current, NON “RC” version.  For me, that was 3.7.0
    3. Download the version for PHP 7.4, NTS, vc15, x64
      1. For me, that was -> php_imagick-3.7.0-7.4-nts-vc15-x64.zip
    4. Make sure you have the Visual C 15 runtime installed.  (Google it and download/install if needed)
  4. Extract the archive above to a temporary directory
  5. copy php_imagick.dll to your PHP\ext directory.
    1. MAKE SURE you are in the correct directory, e.g. for me that was php-7.4.27-nts-Win32-vc15-x64\ext
  6. in the archive directory, SORT BY TYPE.
    1. Copy all CORE_RL*.DLL (28 files)
    2. Copy all FILTER*.DLL  (one)
    3. Copy all IM_MOD_RL (134 files)
    4. copy all these to your PHP version’s ROOT directory.  For me, that was 7.4.27-nts-Win32-vc15-x64  (NOT THE EXT DIRECTORY!)
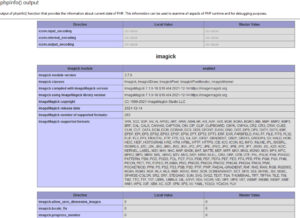
  7.  Go to PHP manager and click on check PHPINFO().  When that comes up, scroll down and make sure you see a section for IMAGICK.
  8.  Note:  If you are using WordPress, please read this post to make sure you don’t get JSON errors.

WordPress There was an error. The response is not a valid JSON response.

If you are running WordPress on IIS and experiencing this issue, another thing you can check is the FastCGI settings to make sure the OPTIONS verb is allowed.

In my case, I am using a brand new setup of WordPress on a Windows Server 2019 IIS 10.0.  When I went to Appearance, Widgets, made a change and clicked “update” I would get the “There was an error. The response is not a valid JSON response.” message.

I looked at all my other settings including SSL, Permalinks, etc. and they all looked good.

THE FIX

On the site with this particular “There was an error. The response is not a valid JSON response.” issue, the fix was easy.

Go to Handler Mappings for the site in question.

Double click the version of PHP that is setup (under PHP Manager)

Go to REQUEST RESTRICTIONS

VERBS

Make sure either “ALL“, or “One of the following” is selected.  If “One of the following” is selected, use this list:

GET,HEAD,POST,OPTIONS


Save your changes/close the dialog boxes and retry your save operation.

How to use the SINTECH XBOX SERIES X S NVME ADAPTER

I recently purchased one of the SINTECH Xbox Series X/S NVME adapters in an attempt to use a less expensive alternative for NVME storage on my XBOX.

This is the item:

XBOX NVME ADAPTER

It took about 10 days for the adapter to transit to the USA.

You will also need a specific NVME 2030 hard drive.

WD CH SN530 (1tb unformatted, ~867gb formatted).  I bought mine on eBay for $110 w/free shipping.

Here is the correct procedure to get the NVME to work.

  1. insert the WD CH SN530 into your NVME PC.
  2. using a “real” partition management software (or via windows command line), delete ALL partitions from the drive.  My factory drive had a small partition then a large partition.  The small partition did not show up under Windows Disk management, thus why I had to use partition software to delete the partitions.
  3. Convert the disk to MBR.
    1. in windows disk management, right click the drive name (in the far left column), and choose convert disk to MBR.
  4. Format the disk NFTS
  5. remove the NVME from your PC
  6. insert into the SINTECH adapter.
  7. plug the adapter board into your XBOX
  8. the drive will recognize.  Format it as a game storage device (NOT MEDIA).
  9. Have fun!

How to configure IIS to allow access to apple-developer-merchantid-domain-association

Also know as how to configure IIS to permit access to files with NO extension.

In this case we need to create a file in this location:

https://(my-website-domain)/.well-known/apple-developer-merchantid-domain-association


  1. Create a directory in your website called “well known”
  2. Create a virtual directory in the IIS manager, alias is .well-known and point it to the directory above.
  3. Place the file from Apple — apple-developer-merchantid-domain-association into the “well known” real directory
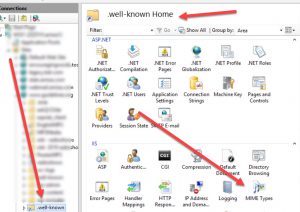
  4. Back in the IIS Manager… click on the .well-known virtual directory
  5. Screenshot:
  6. Click on MIME TYPES
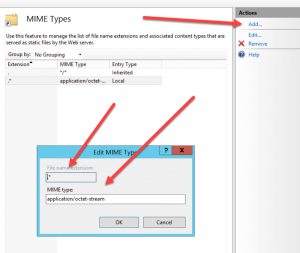
  7. Add a new mime type. Extension .* and Mime type = application/octet-stream
  8. Hit OK
  9. Go test the file from a web browser.  It should now work and you can now have Apple verify your site.

How to get OPEN NAT with Xbox or Xbox One and PFSENSE firewall

Here is my quick & easy guide to getting OPEN NAT inside your network for multiple XBOX’s and inside a PFSENSE FIREWALLED network.

  1. all Xboxes must be configured with a STATIC IP.
    1. under the Xbox Settings, Network, Advanced settings, I use MANUAL IP address setting.
      1. put a static IP inside the range of your network.
      2. as an example:
        1. IP: 192.168.100.20
        2. Subnet: 255.255.255.0
        3. Gateway: 192.168.100.1
        4. DNS: Point it at your PFSENSE box.  192.168.100.1
        5. Secondary DNS: Use Google:  8.8.8.8
      3. Alternate PORT:  not needed // leave at default
      4. clear any alternate MAC addresses.
    2. Save these settings and SHUT DOWN your XBOX.
    3. Pull the plug
  2. Go log into your PFSENSE firewall
  3. I am using a beta version of PFSENSE 2.5.0.a.20200401.1515
  4. You should try to be using as current a version as possible to avoid any issues with outdated PFSENSE code.
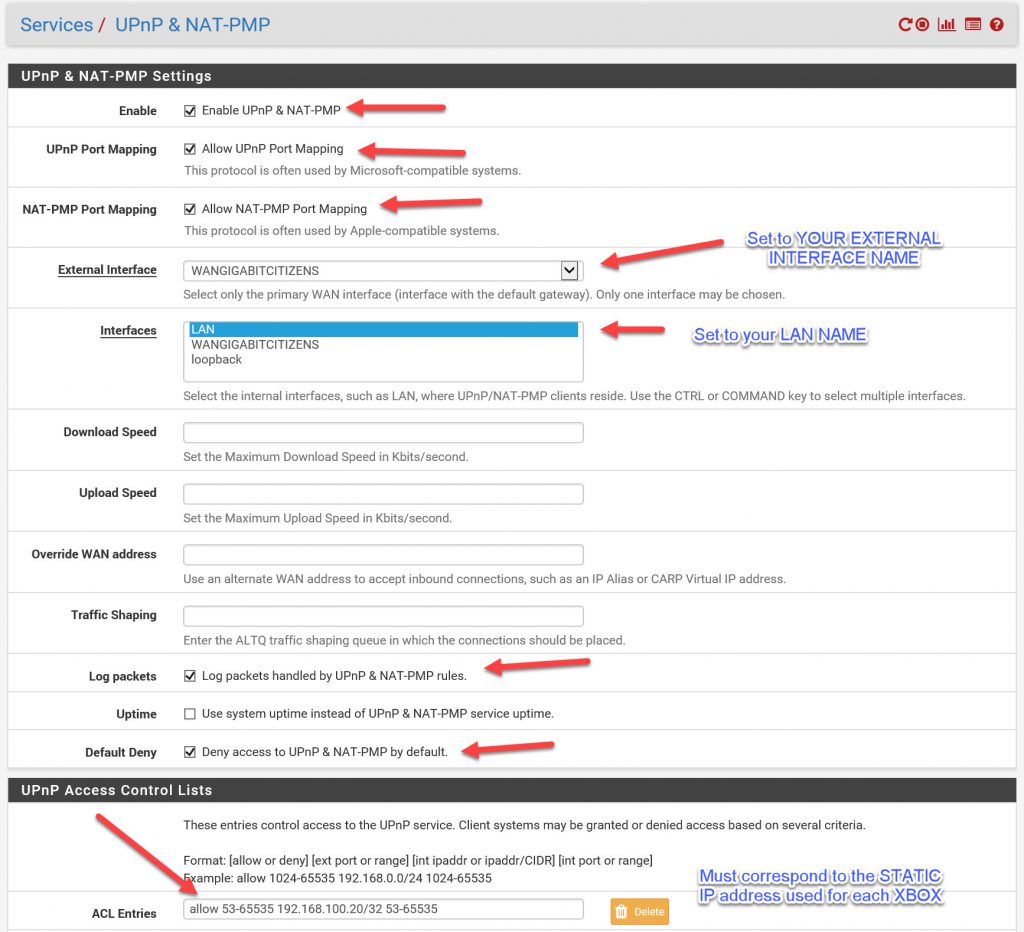
  5. Inside PFSENSE, go to Services/ UPnP & NAT-PMP
    1. Setup your settings like this (click image for larger version):
      Notes:

      1. under ACL ENTRIES, each XBOX’s STATIC IP address must be on it’s own line here.  If you have multiple XBOX’s, create one line entry for each XBOX and edit the IP ADDRESS
      2. HIT SAVE to save your settings here.
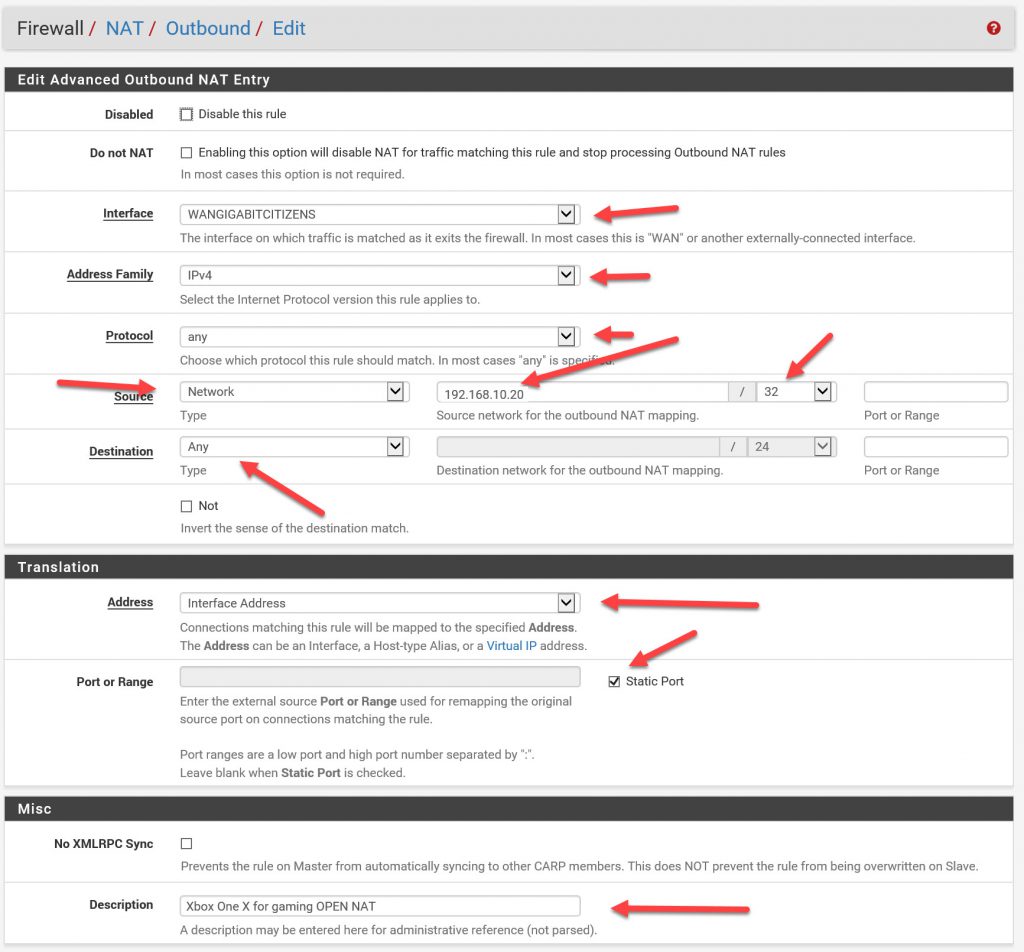
  6. Go to Firewall / NAT / Outbound
    1. Make sure that the MODE is set to Hybrid Outbound NAT rule generation.
    2. Add a mapping (see below, click for larger image)
    3. NOTES:
      1. under SOURCE, you must put the IP address for your XBOX here.
      2. Repeat and add mappings for EACH XBOX (and IP ADDRESS) inside your LAN
      3. SAVE CHANGES
  7. Plug the power back into your Xbox
  8. Power it on
  9. Once it is booted, go to NETWORK / SETTINGS.
  10. RE-RUN NAT TYPE test
  11. RE-RUN MULTIPLAYER test
  12. you should now have “OPEN” NAT


Automatically Empty Google Drive Trash

Want to empty your Google Drive Trash automatically?  I finally have the solution for you.

  1. Make sure you use GOOGLE CHROME web browser for best results.
  2. Open Chrome and go to www.google.com
  3. Make sure you are signed into your Google account.  If not, sign in.
  4. You should OBVIOUSLY have Google Drive account up and running since that’s why you’re here, right?
  5. Go here https://script.google.com/home
  6. Click NEW PROJECT.
  7. Clear out the default code that appears in the next window.
  8. Paste in this code (exactly)
    function createTimeDrivenTriggers() {
      ScriptApp.newTrigger('emptyThrash')
          .timeBased()
          .everyHours(1)
          .create();
    }
    function emptyThrash()
    {
    Drive.Files.emptyTrash();
    }
    
  9. Click the Save Icon
  10. Enter a name such as “Automatically Empty Google Drive Trash”
  11. Click the “Resources -> Advanced Google Services” menu within the Code editor
  12.  Scroll down and turn “Drive API” to “ON”
  13. You should see a message “These services must also be enabled in the Google Cloud Platform API Dashboard”.  Click that link.
  14. NOTE:  If you DO NOT see the message above, click this direct link
  15. Click “ENABLE APIS AND SERVICES”
  16. Locate “Google Drive API” and click it.
  17. Click Enable
  18. Go back to your browser window with the “Advanced Google Services” window still open.
  19. Click OK
  20. Click the “Run” icon within the project editor
  21. You should see “Authorization Required”.  Click Review Permissions
  22. Choose your google account (this links up the script with the proper account).
  23. You will see “This app isn’t verified”.  Click Advanced. Click Go to XXXX Project (unsafe).
  24. Click ALLOW
  25. Save your project again.
  26. Go to “Run->Run Function->createTimeDrivenTriggers”
  27. Hit the “Timer” icon.
  28. You should see your project listed under “Triggers”
  29. Your job is now scheduled to run every 1 hour and empty your trash!


This process was crafted by deciphering the following two pages:

https://stackoverflow.com/questions/32749289/automatically-delete-file-from-google-drive-trash

https://stackoverflow.com/questions/25749906/permanently-delete-file-from-google-drive/32749203

webDNA Error: You are not allowed to change the price

If you are here for this:

Error: You are not allowed to change the price

under webDNA:

How to fix:

1) look at the error text files. It will tell you which script is throwing the error.
2) edit that script and search for “password”. Find the webdna password. it will look like this: password=whatevermypasswordis
3) go to the webDNA control panel. ISP Sandbox.
4) locate the sandbox in question and click the small ADMIN button
5) login (generally with sbadmin/sbadmin)
6) preferences “Price Change Password”. Set the password equal to what you found in #2 above.
7) save
8) retry your page, it should work now.

Recaptcha V2 under classic ASP

Here’s a quick primer on upgrading your Classic ASP site Recaptcha V1 to V2.

First, go to Google Recaptcha online and generate yourself a v2 pair of keys for your site’s domain.

Next:

On the page with the “FORM” on it on which you want to display the Recaptcha V2.

Add to the HEADER (inside the HEAD TAGS):

<script src='https://www.google.com/recaptcha/api.js'></script>


Replace the existing code which renders your v1 recaptcha with this line:

<div class="g-recaptcha" data-sitekey="put your google public v2 key here" ></div>


on your FORM SUBMIT page (where the v2 form gets submitted to):

Inside ASP tags, place this line:

Response.LCID = 1033 ' USA LCID

It is a required element for the JSON Parser.

Inside the HEAD:

<!--#include file="jsonObject.class.asp" -->


you can get this file from my site HERE

now the processing code to handle the Recaptcha JSON response:


If Request.ServerVariables("REQUEST_METHOD") = "POST" Then
 Dim recaptcha_secret, sendstring, objXML
 
 recaptcha_secret = "your secret key goes here"

 sendstring = "https://www.google.com/recaptcha/api/siteverify?secret=" & recaptcha_secret & "&response=" & Request.form("g-recaptcha-response")

 Set objXML = Server.CreateObject("MSXML2.ServerXMLHTTP")
 objXML.Open "GET", sendstring, False

 objXML.Send
 
 set jsonObj = new JSONobject
 set jsonArr = new jsonArray


 jsonString = objXML.responseText
 
 set outputObj = jsonObj.parse(jsonString)  
 
 
 if jsonObj.value("success") then
  Global_Msg="Captcha GOOD!"
 else
  Global_Msg="Invalid Recaptcha Response."
 end if
 
 Set objXML = Nothing
End If

if Global_Msg<>"Captcha GOOD!" then
%>
invalid RECAPTCHA response.  Hit back and try again.
<%
response.end

end if


For your convenience, here is all the code inside one ZIP file.


Let me know if this helped you!


1 2 3 10