Tag Archives: Email

Adding DKIM records to Kerio Connect

If you want to implement DKIM (signed email) to your Kerio Connect setup, here’s the easy way.

Start by reading these links

Kerio link 1

Kerio link 2

The following setup is for Kerio Connect 9.x, and Windows Server 201X DNS server

  1. Make sure your email server is properly connected to a good public DNS server, such as Google (8.8.8.8 and 8.8.4.4.)
  2. Go to Kerio Connect, Configuration, Domains.
  3. Click SHOW PUBLIC KEY and copy it.
  4. paste it into notepad.  We’ll need to rework it a bit to be compatible with Windows DNS.  Note:  Windows DNS limits the length of one single string of characters, so we’ll need to split it into several lines.
  5. Reformat it like this.  Break it into even lines, around 100 characters each.  The exact length doesn’t matter.  Just do it evenly, hit enter at each breakpoint.
  6.  NOTE:  make SURE there is a SPACE between the semicolon and the p
    1. as in v=DKIM1; p=xxxx
  7. example properly reformatted
  8. Copy this reformatted string
  9. Go to the domain in your Windows DNS server.  For example, if your domain is mydomain.com go to that domain in the DNS Server management console.
  10. right click, other records, add TXT record
  11. Record name is:  mail._domainkey
  12. after you enter that, you will see the FQDN look like this:
    1. mail._domainkey.mydomain.com
  13. Paste the string from #7 above into the text box, as-is.
  14. Hit ok and save that change.
  15. repeat this for any other domain.  On Kerio Connect, all the domains on the one email server use the exact same DKIM keys.
  16. Now we are going to test the DKIM record to make sure it can be properly read.
    1. go to https://mxtoolbox.com/
    2. type in your domain
    3. hit check MX
    4. when that completes (successfully), change the drop down to “DKIM Lookup”
      1. type in your full DKIM string:
      2. mail._domainkey.mydomain.com.
    5. Run the DKIM Lookup
    6. You should see a successful test, and your report should look just like this:
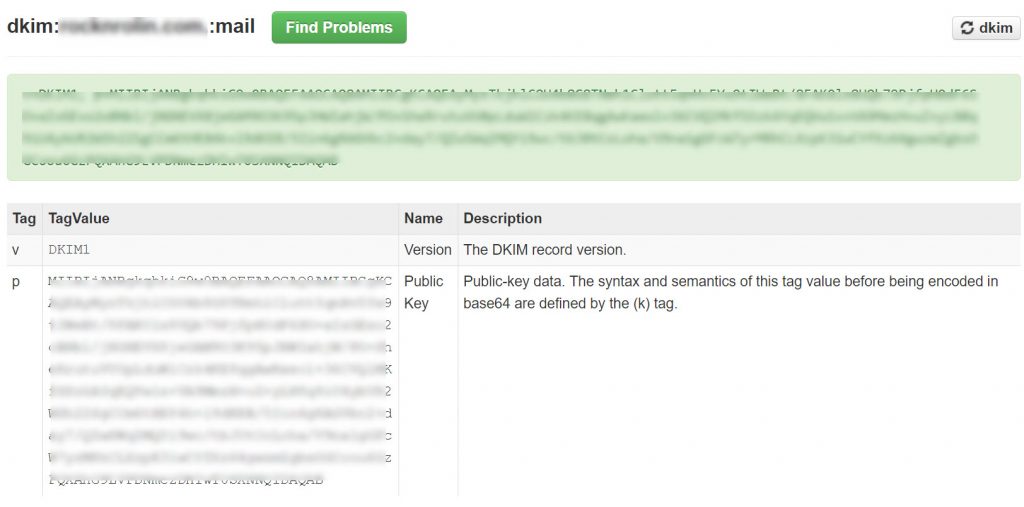
    7. if it doesn’t look like this, then you did something wrong with your TXT record creation, or you forgot to put the entire DKIM key in the lookup.
    8. Since all is well, proceed.
  17. next, go back to Kerio Connect.
  18. while still on the domain, check the checkbox to enable DKIM
  19. If the DNS on your email server is setup properly, and it is communicating properly to your DNS server, you should see the box above.
    1. If you see a message “DKIM public key not found in public DNS”
    2. try restarting KMS
    3. Try going to a command prompt and ipconfig /flushdns
  20. Presuming that you do see the proper message in #18 above, we now need to do a test email to verify everything is working.
  21. Go to http://www.appmaildev.com/en/dkim
  22. click next step
  23. the site will generate an email address
  24. copy this email address and send a blank email to that address FROM AN EMAIL ACCOUNT ON THE DOMAIN you setup with DKIM above.
  25. Wait for the site to receive the email and generate it’s report (a few seconds)
  26. you should see DKIM = PASS


While you’re at it, don’t forget to create SPF and DMARC records for your domain to cover all the bases.


Proper DNS configuration for iPhone and Exchange Autodiscover

In order to get Autodiscover to work properly on your iPhone when doing an “Exchange” setup, you need the correct DNS records.

**note: I am assuming you already have a proper SSL cert on your email server, have the correct ports opened (80, 443m 587) and you KNOW your email server is working properly.  You’ll also need a standard MX record that points at your server.


Additional DNS records needed to make autodiscover work on an iPhone:

Create an SRV record with the following settings (on each domain you want autodiscover to work)

Service:  _autodiscover

Protocol: _tcp

domain: your domain (this should be prefilled under windows server when setting up the SRV record)

Priority: 0

Weight: 5

Port: 443

Target:  the mx record name for your server, for example, mail.yourdomain.com  (this MUST match the MX record name)


One more record needed:

Create an A record called autodiscover and point it to the same IP as your MX record IP address.


** at this point you are at the mercy of the public DNS servers expiring their cache and catching the new records.


iPhone Setup

on your iPhone, add email account, pick Exchange

type in the email address and password.  description (whatever you want here)

hit Next

At this point, one of two things may happen:

  1. you may get a server warning message.  if you do, click CONTINUE
    1. when you do that you (should) go right to the “Exchange” screen in #2 below.
  2. you may go directly to the “Exchange” screen with radio boxes for mail, contacts etc.

If you get the dreaded “server name” screen instead, this means your phone is not picking up the most current DNS settings.

Try it again later…

These settings have been tested and confirmed, so it does work – but like I said you have to wait for the DNS settings to get updated by whatever DNS server you are using.  If you have your TTL set very high (hours or a day) you may have to wait a day for this to work.


TEST YOUR AUTODISCOVER SETUP:

https://testconnectivity.microsoft.com

go to the above URL and run the “Outlook Autodiscover” test.

You’ll need to enter in an actual mailbox account username and password, but it will fully test your setup and verify that autodiscover is properly setup.


Using SPF on your domains…

It’s a good idea if you have a domain – and you have access to your DNS server, that you setup and use (properly) SPF records.  SPF = Sender Policy Framework.  This is an an e-mail validation system designed to prevent e-mail spam by addressing a common vulnerability, source address spoofing.  Here at Amixa, we use SPF records on all of our domains that send email, just to add another layer of anti-spam protection for our clients.

In recent weeks we’ve noticed a sharp increase in spoofed “from” email addresses attached to bulk email sent by spammers.  The “Amixa Sales” email address has been spoofed by some senders and any receipient’s ISP that uses SPF lookups, are properly rejecting the spam messages because the email messages do not originate from our email server.  I am sure other people are getting spam emails using our forged email address, but that is just the way things happen on the internet.  Some people are good, and others aren’t!

For more reading, learn about SPF here

To check your SPF records after you have them in place, click here