How to get OPEN NAT with Xbox or Xbox One and PFSENSE firewall
Here is my quick & easy guide to getting OPEN NAT inside your network for multiple XBOX’s and inside a PFSENSE FIREWALLED network.
- all Xboxes must be configured with a STATIC IP.
- under the Xbox Settings, Network, Advanced settings, I use MANUAL IP address setting.
- put a static IP inside the range of your network.
- as an example:
- IP: 192.168.100.20
- Subnet: 255.255.255.0
- Gateway: 192.168.100.1
- DNS: Point it at your PFSENSE box. 192.168.100.1
- Secondary DNS: Use Google: 8.8.8.8
- Alternate PORT: not needed // leave at default
- clear any alternate MAC addresses.
- Save these settings and SHUT DOWN your XBOX.
- Pull the plug
- under the Xbox Settings, Network, Advanced settings, I use MANUAL IP address setting.
- Go log into your PFSENSE firewall
- I am using a beta version of PFSENSE 2.5.0.a.20200401.1515
- You should try to be using as current a version as possible to avoid any issues with outdated PFSENSE code.
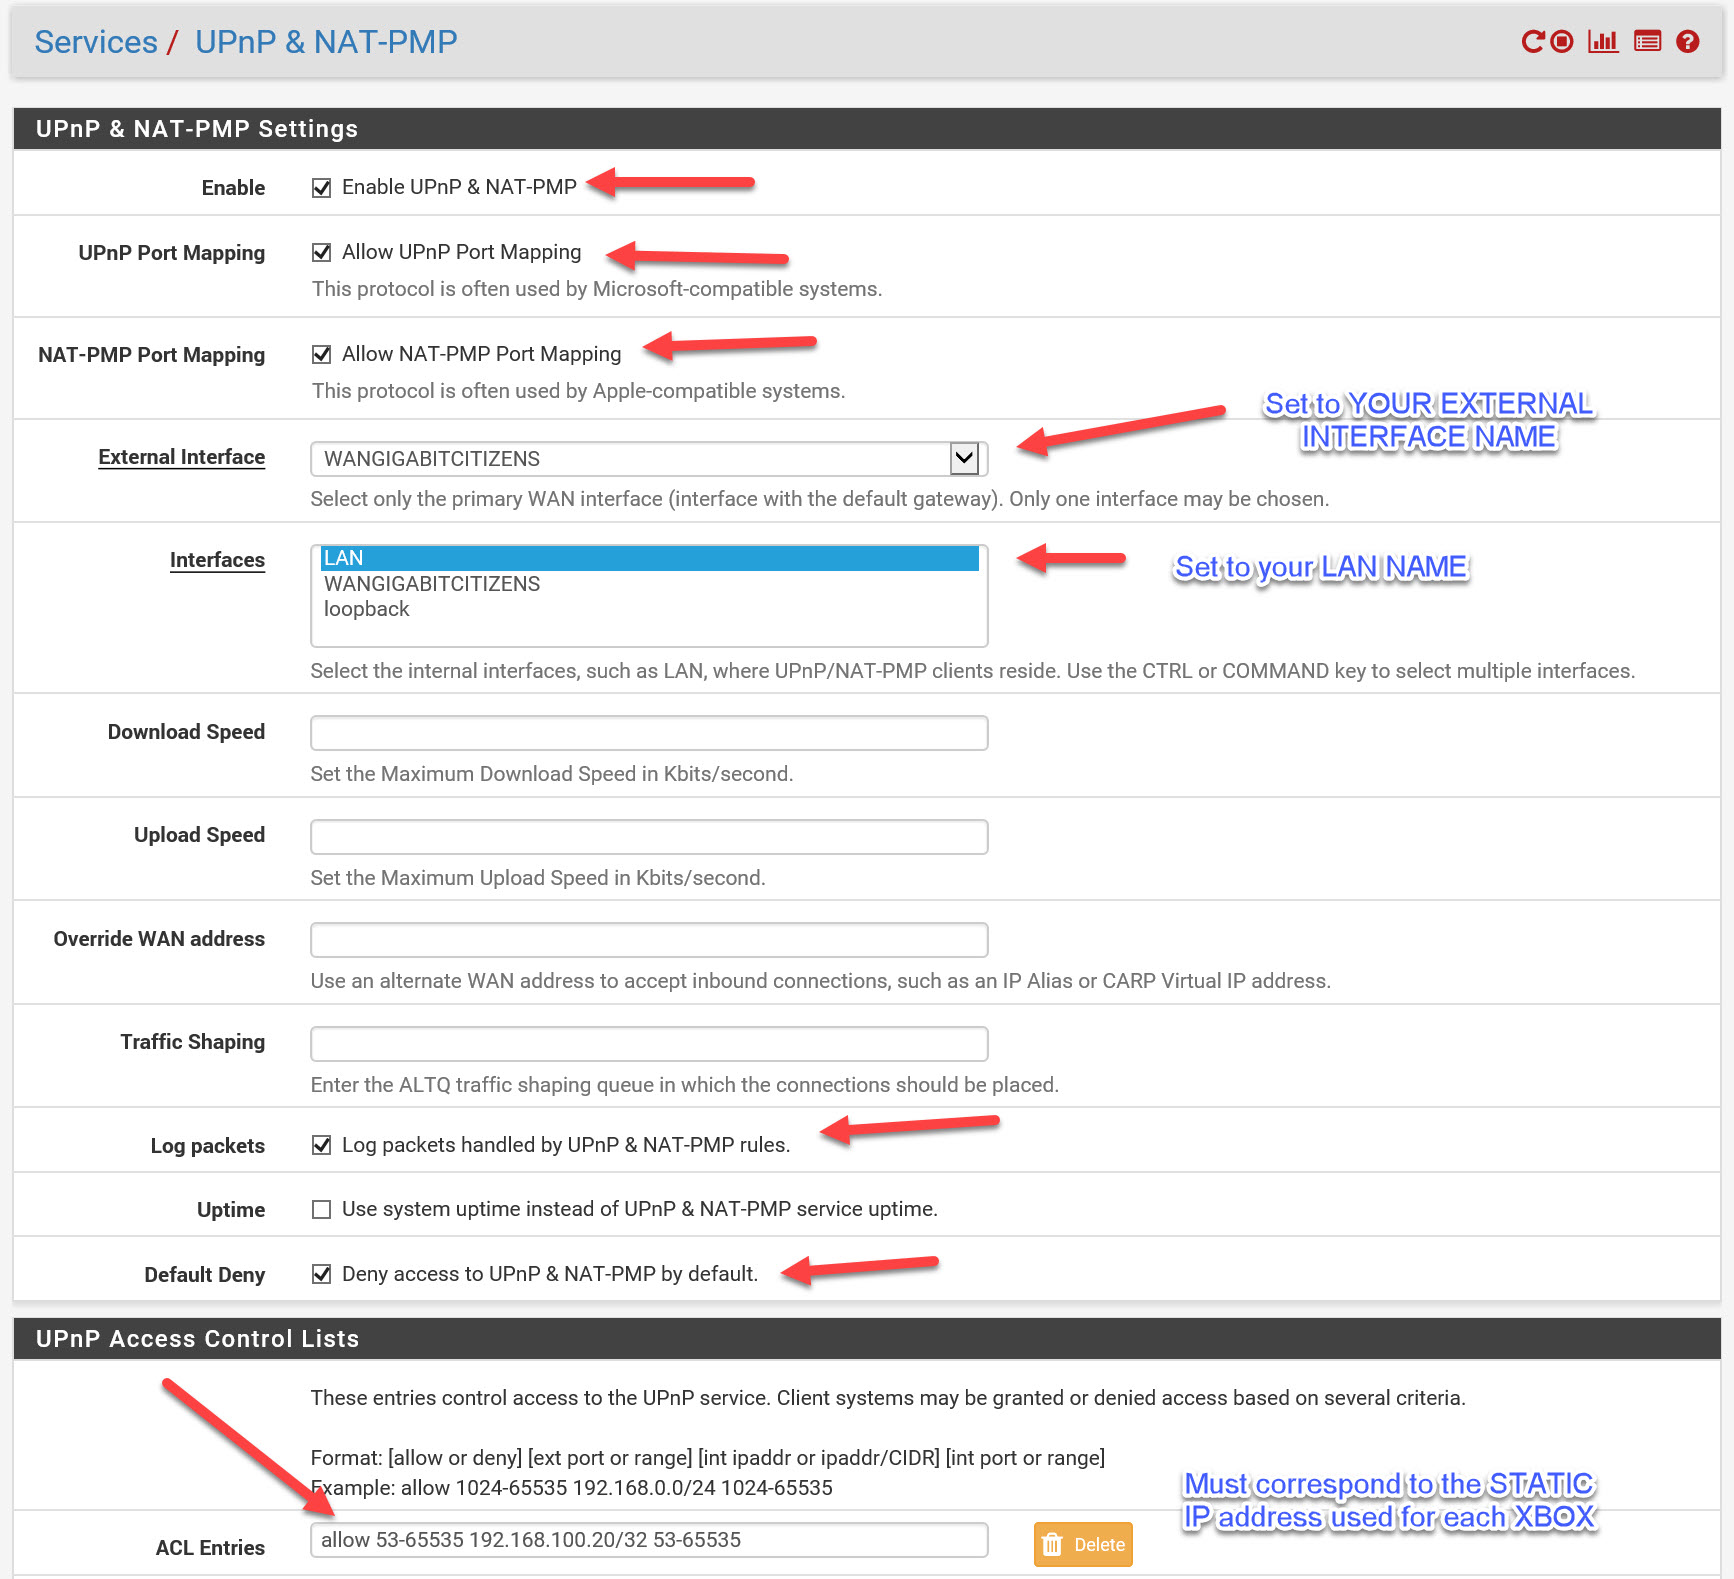
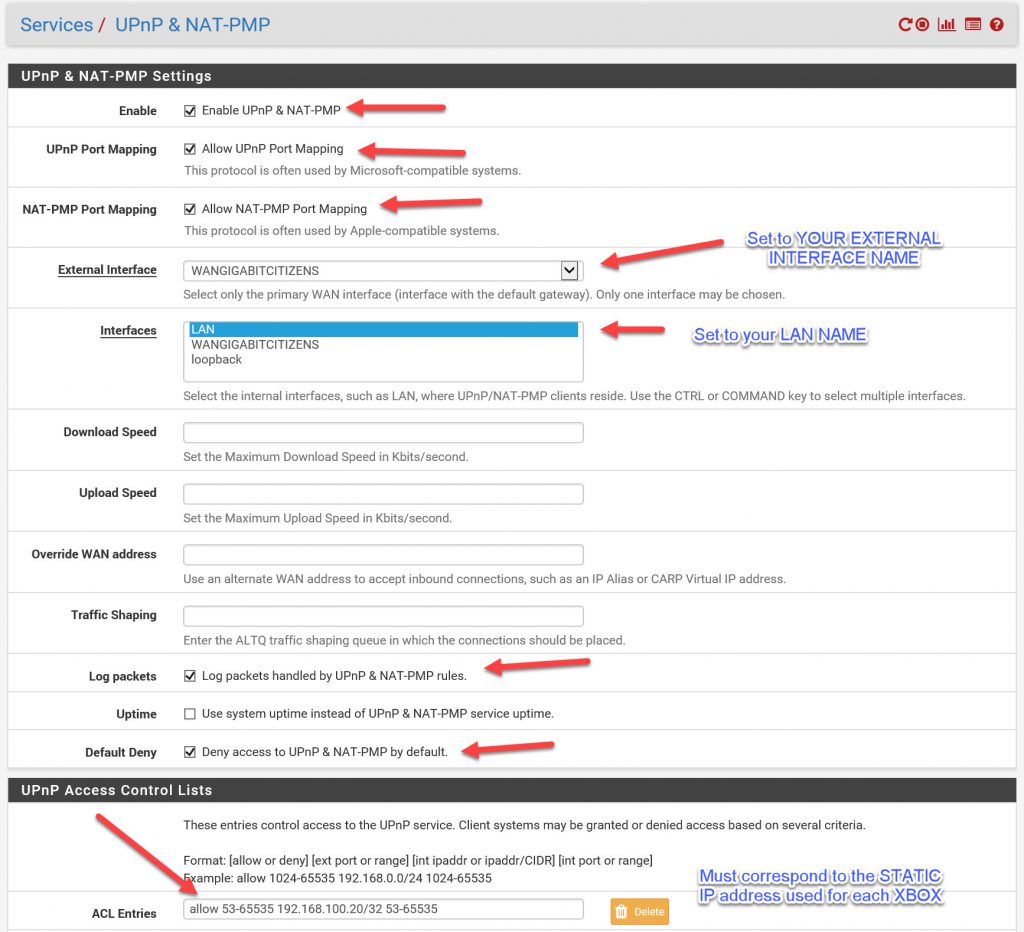
- Inside PFSENSE, go to Services/ UPnP & NAT-PMP
- Setup your settings like this (click image for larger version):
 Notes:
- under ACL ENTRIES, each XBOX’s STATIC IP address must be on it’s own line here. If you have multiple XBOX’s, create one line entry for each XBOX and edit the IP ADDRESS
- HIT SAVE to save your settings here.
- Setup your settings like this (click image for larger version):
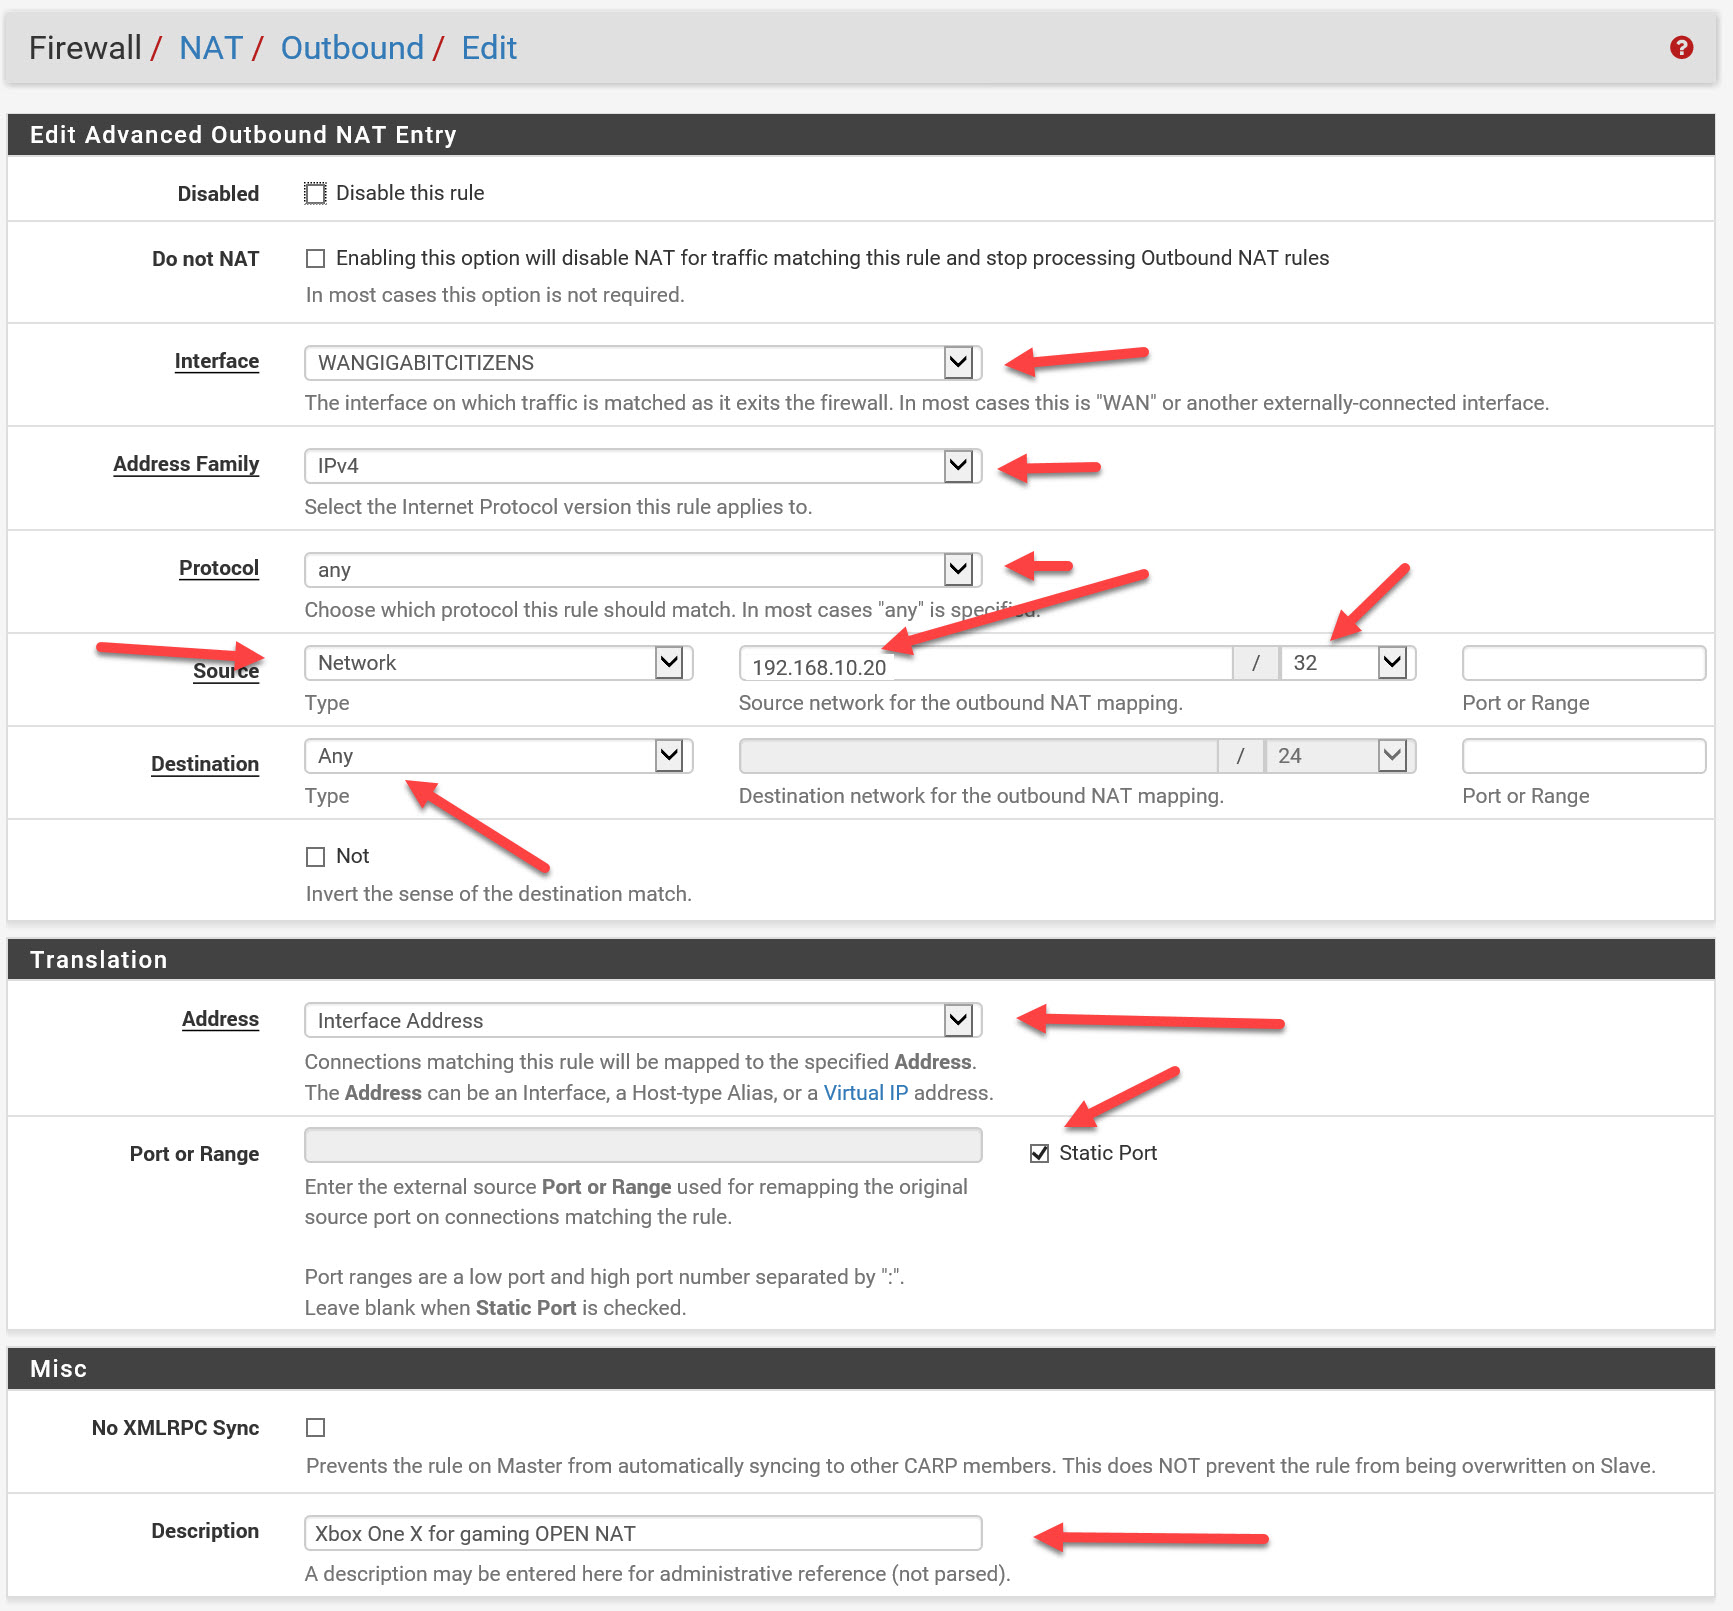
- Go to Firewall / NAT / Outbound
- Make sure that the MODE is set to Hybrid Outbound NAT rule generation.
- Add a mapping (see below, click for larger image)

- NOTES:
- under SOURCE, you must put the IP address for your XBOX here.
- Repeat and add mappings for EACH XBOX (and IP ADDRESS) inside your LAN
- SAVE CHANGES
- Plug the power back into your Xbox
- Power it on
- Once it is booted, go to NETWORK / SETTINGS.
- RE-RUN NAT TYPE test
- RE-RUN MULTIPLAYER test
- you should now have “OPEN” NAT