How to get OPEN NAT with Xbox or Xbox One and PFSENSE firewall
Here is my quick & easy guide to getting OPEN NAT inside your network for multiple XBOX’s and inside a PFSENSE FIREWALLED network.
- all Xboxes must be configured with a STATIC IP.
- under the Xbox Settings, Network, Advanced settings, I use MANUAL IP address setting.
- put a static IP inside the range of your network.
- as an example:
- IP: 192.168.100.20
- Subnet: 255.255.255.0
- Gateway: 192.168.100.1
- DNS: Point it at your PFSENSE box. 192.168.100.1
- Secondary DNS: Use Google: 8.8.8.8
- Alternate PORT: not needed // leave at default
- clear any alternate MAC addresses.
- Save these settings and SHUT DOWN your XBOX.
- Pull the plug
- under the Xbox Settings, Network, Advanced settings, I use MANUAL IP address setting.
- Go log into your PFSENSE firewall
- I am using a beta version of PFSENSE 2.5.0.a.20200401.1515
- You should try to be using as current a version as possible to avoid any issues with outdated PFSENSE code.
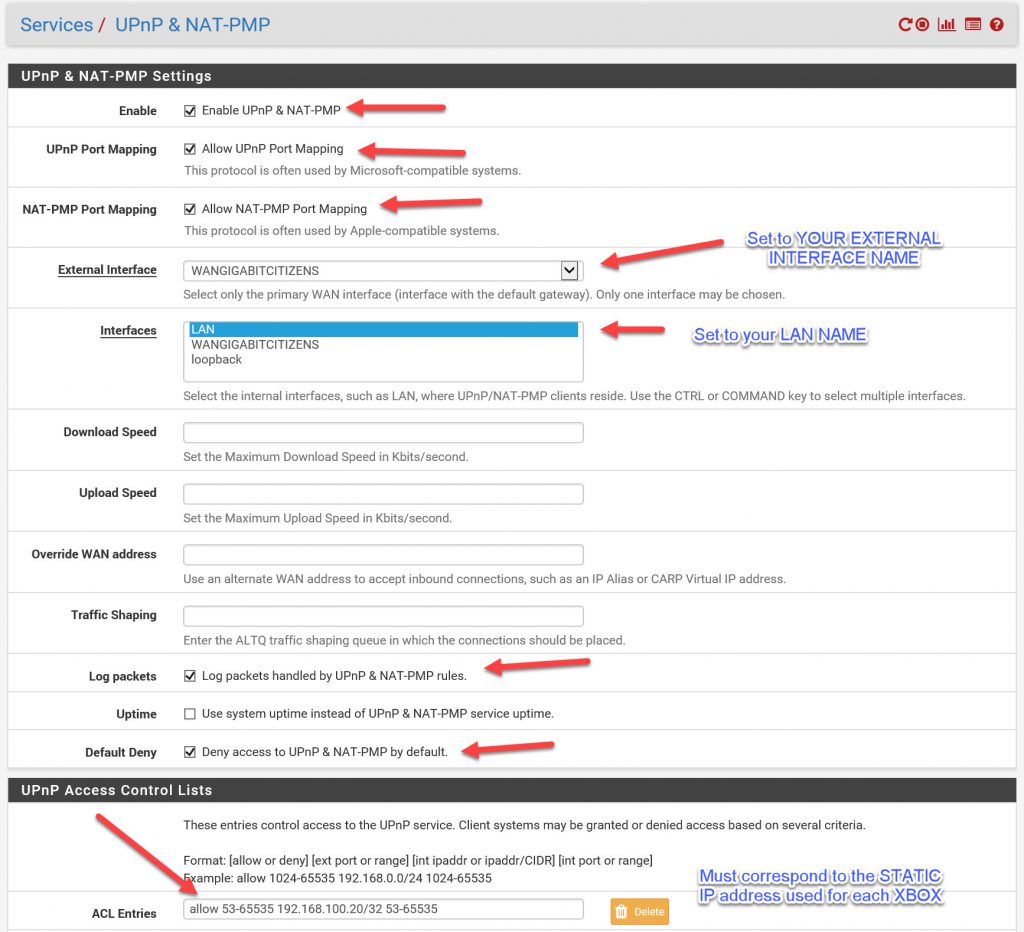
- Inside PFSENSE, go to Services/ UPnP & NAT-PMP
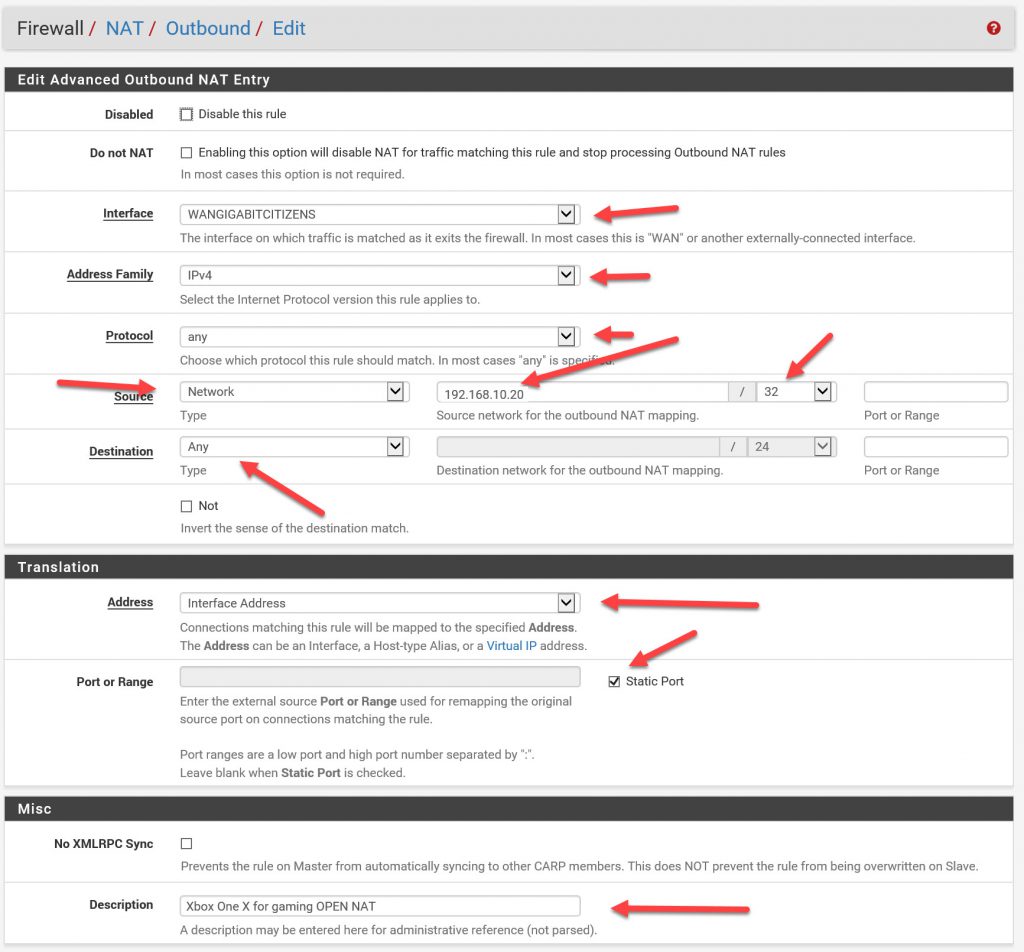
- Go to Firewall / NAT / Outbound
- Plug the power back into your Xbox
- Power it on
- Once it is booted, go to NETWORK / SETTINGS.
- RE-RUN NAT TYPE test
- RE-RUN MULTIPLAYER test
- you should now have “OPEN” NAT


Thank you so much for posting this. Worked for two XBOX Series X in my house.